MUTHUH's RIDES - RIDING TIPS - "Quick Lift"
May 11, 2005
I've been using this lift technique for about a year now, and several friends who've seen it in my garage commented that I should patent it... so I did - or at least it's pending...I've waited for the paperwork to be reurned before publishing it here, so here ya go - don't wait for the retail version - get out your woodworking tools and make yer own.
 Start off with a Craftsman lift from any sears store - on sale it ran about a hundred buck... then using pieces of lumber - (hey - I'm not gonna just give you all the specs - make yer own and improve on it yourself) - design a ramping system to ride over the lift arms..
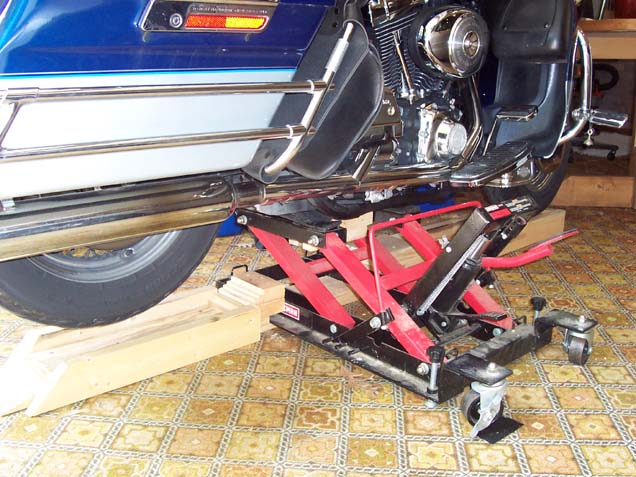
 I put rails on them to keep the tires aligned properly and an insert of wood in between the lift arms to roll over easily. It is important to place the front tire stop precisely so the lift arms are such that they contact the frame and crossmember at the center of gravity. I found if the rear lift arm is placed under the rear frame crossmember, it works perfectly.
 Then at the end of a days ride, I just drive up the ramp, into the channels, over the lift arms and rest the front tire against the front stop.
 While still seated on the bike, and granted I got long legs, but it's not much of a stretch, I simply give the hydraulic foot pedal about 6 pumps from the seat of the bike to lift the bike about an inch or two - steady enoough to not even need the kickstand.
 Then I get off the bike and pump it up some more. Don't make the side rails too high, because the bike lifts up and toward the foot pump pedals and therefore up and over the side rails when elevated.
 This view shows the bike at the first safety stop height. Pressure is off the shocks and tires.
 After it is raised high enough to set the safety it is good to leave it for as long as you wish. When I want to work on the bike or clean it, I raise it to the thrid stop position. Granted the lift is kinda in the way a little on the carb side of the bike, but this is no different from when using the lift alone.
 When I want to leave again, I raise it slightly, remove the safety bar, and drop it to almost fully down, get on, and press the smaller release pedal and the tires drop into the channels, and I pull it back.
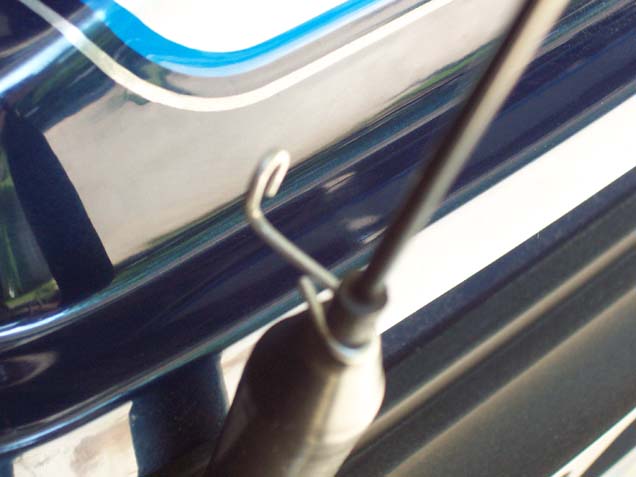
 Not long after I made this setup - I found that I could position the bike so the garage door closes within an inch of the bike, allowing to maximum room in the garage. But the twin AM/FM and CB antennas always got jammed in the garage door as it closed, so I added this little clip - also patent pending - to the antenna...
 Now in the garage after I get off, and also anywhere the antenna is a hazzard, like backed up on Main Street in Daytona, I whip it around almost into a circle, and clip it in place (I used to shove it in the backrest of the tourpack, but it got in the way of opening the lid - this doesn't.
 This is the far view showing the antenna stowed away in the garage and staying out of peoples faces... it's simple to make with about 1.5" of baling wire (we ALL keep that on our bikes don't we? Right next to the black duct tape?) and a needlenose pliers... and no the antenna does not ever assume that shape when released - it's very pliant and resumes its original straight shape when released.
For Information, contact:
Muthuh@Muthuh.com
MUTHUH'S RIDES HOME |
ARCHIVES |
FUTURE TRIPS
ALL IMAGES COPYRIGHT MUTHUH'S RIDES UNLESS SPECIFIED OTHERWISE
ALL RIGHTS RESERVED.
PLEASE RESPECT COPYRIGHT LAWS AND DO NOT COPY OR USE THESE PICTURES FOR ANY REASON UNLESS WITH WRITTEN PERMISSION. IN ADDITION TO LEGAL PRECEEDINGS, I WILL HUNT YOU DOWN, BURN YOUR BIKE, SCARE YOUR CHILDREN, POST NAKED PICTURES OF YOU AND YOUR OLD LADY AND OTHERWISE MAKE YOUR LIFE A MISERABLE HELL. (Well... OK - I won't burn your bike - THAT's just going a little too far.)
OTHER THAN THAT - HEY! ... HAVE A NICE DAY.
|